
Ryobi Table Saw Instruction Manual: A Comprehensive Guide
This manual details Ryobi table saw operation, covering models like RTS20, RTS08, and RTS12. It includes safety, assembly, and maintenance for optimal performance.
Ryobi table saws offer a balance of affordability and functionality, making them popular choices for DIY enthusiasts and hobbyists. These saws, including models like the RTS20 and RTS08, are designed for portability and ease of use, often featuring folding stands for convenient storage and transport. Ryobi’s commitment to innovation is evident in their Precision System compatibility with tools like the BT3000 and BT3100.
This guide provides comprehensive instructions for safe operation, assembly, and maintenance, ensuring users can maximize the performance and longevity of their Ryobi table saw. Understanding your specific model is crucial, so locating the model number is a key first step.
Understanding Ryobi Table Saw Models
Ryobi offers a range of table saw models to suit various needs and budgets. The RTS20 is a 10-inch folding stand portable saw, ideal for job sites. The RTS08 is an 8-1/4 inch compact, corded option, prioritizing portability. RTS12 provides a 10-inch table saw with a folding stand, offering a balance of features.
Each model has unique specifications, like rip capacity – the RTS20 boasts 32-1/2 inches. Understanding these differences is vital for selecting the right saw for your projects and ensuring proper operation and maintenance.
Ryobi RTS20: 10-inch Folding Stand Portable Table Saw
The Ryobi RTS20 is a popular choice for DIY enthusiasts and professionals needing portability. Featuring a 15 Amp motor and 4800 RPM, it delivers sufficient power for various cutting tasks. Its 32-1/2 inch rip capacity allows for processing wider boards. The folding stand enhances transport and storage convenience.
This model is often praised for its value and ease of use, making it a strong contender against higher-priced brands. Regular maintenance, including blade alignment checks, ensures optimal performance and longevity.
Ryobi RTS08: 8-1/4 in. Compact Portable Corded Jobsite Table Saw
The Ryobi RTS08 is designed for jobsite portability, offering a compact and lightweight solution for cutting tasks. Powered by a 13 Amp motor, it’s suitable for a range of materials. While lacking a folding stand in its base configuration, its smaller size simplifies transport;
Users appreciate its affordability and convenience for quick cuts. Dust collection accessories are available to enhance cleanliness. Common issues include blade alignment, addressed through careful adjustment and maintenance.
Ryobi RTS12: 10 in. Table Saw with Folding Stand
The Ryobi RTS12 combines a 10-inch cutting capacity with the convenience of a folding stand, enhancing portability and storage. Equipped with a 15 Amp motor and reaching 4800 RPM, it handles various woodworking projects efficiently. A 32-1/2 inch rip capacity allows for processing wider boards.
The folding stand simplifies transport and setup, making it ideal for job sites. Users benefit from its balance of power and portability, though dust collection may require additional accessories.
Safety Precautions
Prioritize safety when operating your Ryobi table saw. Always wear safety glasses and hearing protection. Keep hands clear of the blade and utilize push sticks for smaller pieces. Ensure the blade guard is properly installed and functioning before each use. Disconnect the power cord before making adjustments or changing blades.
Be aware of kickback risks and maintain a firm grip on the workpiece. Never reach over or across the blade. Inspect the saw for damage before operation and address any issues promptly.
General Safety Rules

Always read and understand this manual before operating the Ryobi table saw. Maintain a clean and well-lit workspace, free from obstructions. Never operate the saw when tired or under the influence of drugs or alcohol. Ensure proper ventilation when working, especially during prolonged use. Use only accessories compatible with the saw.
Avoid loose clothing and jewelry that could get caught in the blade. Inspect workpieces for nails or other foreign objects before cutting. Be mindful of bystanders and keep them at a safe distance.

Specific Safety Features of Ryobi Table Saws
Ryobi table saws incorporate several safety features designed to protect the operator. Blade guards are crucial, preventing accidental contact with the rotating blade. Anti-kickback pawls minimize the risk of workpiece rebound. A splitter helps prevent the kerf from closing and pinching the blade. Emergency stop switches allow for immediate power shutoff.
Regularly inspect these features for proper function and damage. Never disable or bypass safety devices, as this increases the risk of injury. Understand the function of each safety component before operation.
Parts Identification
Understanding your Ryobi table saw’s components is essential for maintenance and repair. Key parts include the table, blade, motor, stand (if applicable), blade guard, and rip fence. Locating the model number – typically on a label – is crucial for ordering replacement parts. This number (e.g., RTS20, RTS08, RTS12) identifies the specific saw model.
Ryobi’s official parts website provides exploded diagrams and part lists based on the model number. Familiarize yourself with these diagrams to accurately identify needed components.
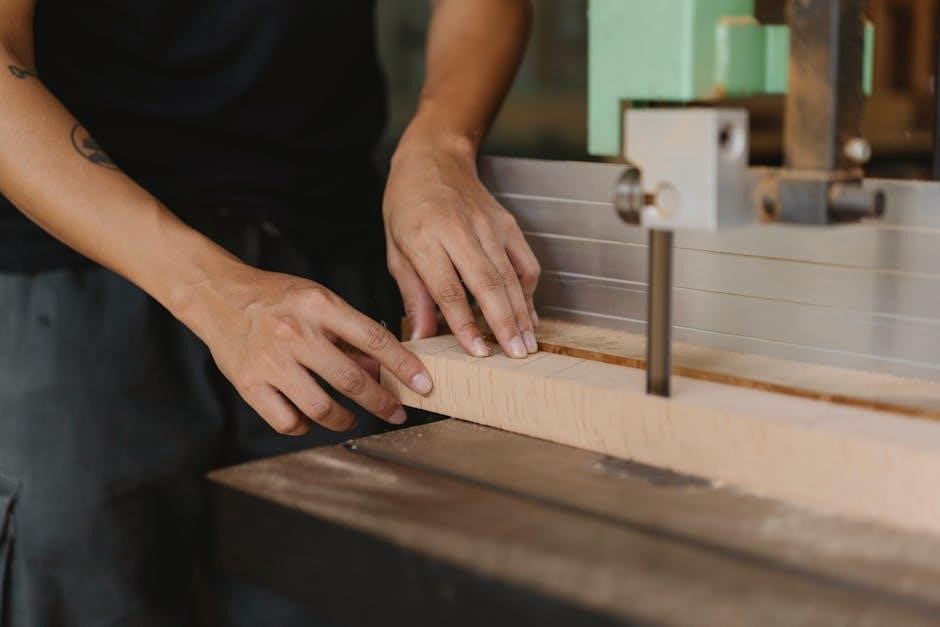
Table Saw Components Overview
Ryobi table saws feature a robust table surface providing a stable work area. The powerful motor drives the blade, enabling precise cuts. A blade guard enhances safety by shielding the operator. The rip fence ensures straight, accurate cuts along the wood’s length. Models like the RTS20 include a folding stand for portability, while others, like the RTS08, are compact and jobsite-ready.
Essential components also include the switch assembly and dust collection port, contributing to safe and clean operation.
Locating the Model Number
Identifying your Ryobi table saw’s model number is crucial for accessing the correct parts diagrams and support. The model number, beginning with “RTS,” is typically found on a label affixed to the saw. Carefully inspect the lower portion of the saw’s base or the motor housing. This label contains vital information, including the serial number and voltage requirements.
Accurate model identification ensures compatibility when ordering replacement parts or seeking assistance from Ryobi customer support.
Assembly Instructions
Before operating your Ryobi table saw, proper assembly is essential for safe and efficient use. If your model includes a stand, begin by securely attaching it to the saw’s base following the diagrams in your owner’s manual. Ensure all bolts are tightened to the manufacturer’s specifications. Next, install the blade guard – a critical safety component – by aligning it with the designated mounting points.
Double-check all connections before proceeding to operation.
Attaching the Stand (if applicable)
For Ryobi table saw models featuring a folding stand, carefully unpack all components and identify the stand’s legs and attachment hardware. Position the saw upside down on a protected surface to access the mounting points. Align the stand’s brackets with the corresponding slots on the saw’s base. Securely fasten the stand using the provided bolts and washers, ensuring they are tightened firmly but not overstressed.
Verify the stand’s stability before uprighting the saw.
Installing the Blade Guard
The blade guard is a crucial safety feature on your Ryobi table saw, protecting you from accidental contact with the rotating blade. Locate the blade guard and its mounting hardware within the accessory pack. Align the guard’s mounting points with the designated slots on the saw’s table, typically near the blade opening. Secure the guard using the provided screws, ensuring it moves freely and covers the blade adequately.
Always use the blade guard during operation.
Operating Instructions
Before operating your Ryobi table saw, ensure the blade is correctly installed and the guard is securely in place. To power on, locate the switch and depress the safety lock, then activate the switch; For straight cuts, align your material with the fence and feed it smoothly through the blade. Miter cuts require adjusting the bevel angle, while bevel cuts involve tilting the blade.
Always maintain control and follow safety guidelines.
Powering On and Off
Before initiating operation, verify the blade is properly installed and all safety features are engaged. To power on the Ryobi table saw, locate the power switch, typically featuring a safety lock mechanism. Depress the lock to release it, then firmly press the switch to activate the motor. To power off, release the switch; it should immediately stop the blade.
Never attempt to bypass the safety lock.
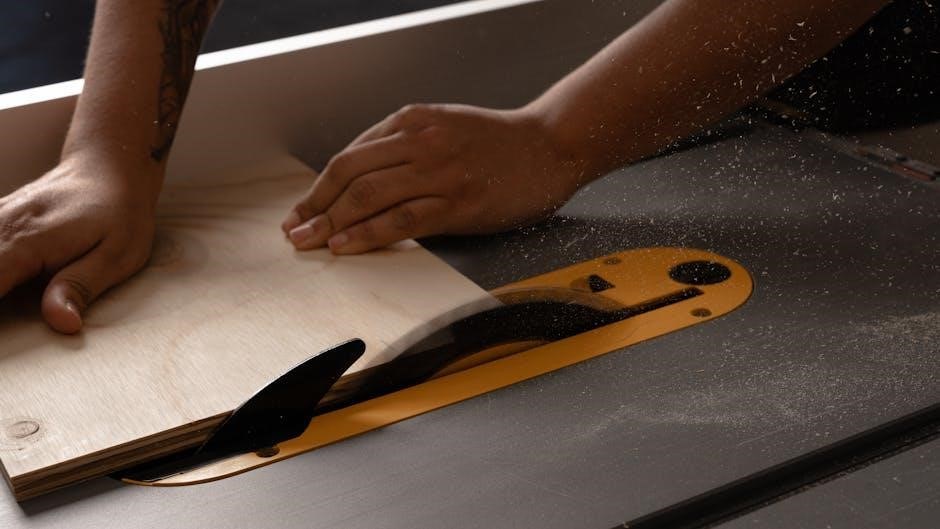
Making Straight Cuts
For precise straight cuts, ensure your workpiece is firmly supported against the fence. Adjust the fence to the desired width, locking it securely in place. Feed the material smoothly and evenly through the blade, maintaining consistent pressure. Avoid forcing the wood, allowing the blade to do the work. Use a push stick for smaller pieces to maintain safe hand positioning and control throughout the cut.

Making Miter Cuts
To execute miter cuts, unlock and rotate the table to the desired angle, securing it firmly once set. Ensure the blade is aligned with the miter slot for accuracy. Position the workpiece against the fence, maintaining a consistent angle throughout the cut. Use a miter gauge for enhanced precision, especially for crosscuts. Always double-check the angle before initiating the cut to avoid errors and material waste.
Making Bevel Cuts
Bevel cuts require tilting the blade to a specific angle, secured tightly after adjustment. Always disconnect power before altering blade inclination. Verify the angle using a bevel gauge for accuracy, ensuring consistent results. Feed the workpiece carefully, maintaining firm contact with the fence and table. Monitor the cut closely, as bevels can introduce unique challenges. Prioritize safety by using appropriate push sticks and guarding.
Blade Selection and Installation

Choosing the correct blade is crucial for optimal cuts; consider material and desired finish. Ryobi saws accommodate various blade types, from general purpose to specialized options. Always disconnect power before blade changes. Use the correct wrench to loosen the arbor nut, then remove the blade. Install the new blade, ensuring proper direction, and tighten the nut securely. Verify blade stability before operation. Refer to the manual for specific blade recommendations.
Choosing the Right Blade
Selecting the appropriate blade significantly impacts cut quality and safety. Consider the material – wood, metal, or plastic – and the desired cut type. General-purpose blades suit various tasks, while rip blades excel at cutting with the grain. Crosscut blades are ideal for cutting against the grain. Blade tooth count affects finish; higher counts yield smoother results. Ensure blade diameter matches your Ryobi saw’s specifications. Prioritize quality for durability and precision.
Changing the Blade
Always disconnect power before changing the blade. Use the provided wrench to loosen the arbor nut. Secure the blade with the arbor lock, if equipped. Remove the old blade, noting its orientation. Clean the arbor and flange surfaces thoroughly. Install the new blade, ensuring correct rotation direction. Tighten the arbor nut securely, but avoid over-tightening. Verify blade stability before operation. Refer to your model’s specific diagram for correct procedure and part locations.
Dust Collection System
Effective dust collection is crucial for a clean and safe workspace. Attach the dust bag securely to the designated port on the table saw. Ensure a tight seal to maximize suction. For optimal performance, consider connecting a shop vacuum. Regularly empty the dust bag to prevent clogging and maintain airflow. Inspect the dust port for obstructions. Compatible dust collector bags are available for Bosc, Dewalt, Makita, and Craftsman tools, enhancing your dust removal capabilities.
Attaching the Dust Bag
Begin by locating the dust collection port on your Ryobi table saw. Carefully align the dust bag’s opening with this port. Push firmly until you hear a click, ensuring a secure connection. Verify the seal around the port to prevent dust leakage during operation. A loose connection will reduce collection efficiency. Periodically check the bag’s attachment, especially during extended use. Proper attachment is vital for maintaining a clean and healthy work environment, minimizing airborne particles.

Optimizing Dust Collection
Ensure the dust bag is not overfilled, as this restricts airflow. Regularly empty the bag for peak performance. Inspect the dust port and bag connection for any blockages or tears. A tight seal is crucial; use tape if needed. Consider a shop vacuum connected to the port for enhanced suction. Minimize gaps around the blade guard. Proper dust collection improves visibility, reduces cleanup, and protects your respiratory health during woodworking projects.
Maintenance and Troubleshooting
Regular cleaning prevents dust buildup affecting performance. Inspect the blade for sharpness and damage; replace as needed. Address blade alignment issues promptly to ensure accurate cuts. If experiencing motor power inconsistencies, check the power cord and circuit breaker. Ensure proper ventilation to prevent overheating. Consult the manual for detailed troubleshooting steps. Routine maintenance extends the saw’s lifespan and maintains optimal cutting precision, preventing costly repairs.
Cleaning the Table Saw
Disconnect the power before any cleaning procedure. Remove the dust bag and dispose of collected debris. Wipe down the table surface with a damp cloth, removing sawdust and resin. Clean the blade guard and surrounding areas to maintain visibility. Inspect and clean the fence and miter slots, ensuring smooth operation. Avoid using harsh chemicals or abrasive cleaners that could damage the finish. Regular cleaning prevents buildup, ensuring accurate cuts and prolonging the saw’s life.
Blade Alignment Issues
Misalignment causes inaccurate cuts and potential kickback. Check blade parallelism to the miter slots using a gauge. Ensure the blade is perpendicular to the table surface. Loosen blade mounting bolts slightly, then re-tighten after alignment. Inspect the fence for squareness and adjust if necessary. Verify trunnion assembly tightness. If issues persist, consult the Ryobi parts lookup for replacement components. Proper alignment is crucial for safety and precision; seek professional help if unsure.

Motor Power Inconsistencies
Reduced power often indicates worn brushes or electrical issues. Inspect carbon brushes for wear and replace if needed – Ryobi offers replacements. Check the power cord for damage and ensure a stable voltage supply. A clogged dust port can strain the motor; clean it thoroughly. Listen for unusual noises during operation, signaling potential bearing problems. If power remains inconsistent, avoid use and consult a qualified technician for diagnosis and repair; do not attempt complex fixes yourself.
Replacing Common Parts
Routine maintenance often requires part replacements. The switch assembly (part number 089110109712) is a frequent replacement, readily available online. Brush caps, made of durable plastic, are sold individually and ensure proper brush contact. Always disconnect power before any repair. Refer to your model’s diagram for correct placement. Ryobi’s official parts website provides detailed schematics. Genuine Ryobi parts guarantee compatibility and performance. Incorrect parts can cause malfunctions or safety hazards; exercise caution during installation.
Switch Assembly Replacement
Replacing the switch assembly (FIX10078233, part number 089110109712) requires disconnecting the table saw from power. Carefully remove the old switch, noting wire connections for accurate reattachment. Ensure the new switch is an OEM-approved replacement compatible with your Ryobi model. Connect wires securely, referencing diagrams in the owner’s manual. Test the switch functionality before reassembling the saw’s housing. Improper wiring can lead to electrical hazards; double-check all connections. A faulty switch prevents safe operation.
Brush Cap Replacement
The brush cap, a durable plastic component sold individually, protects the motor brushes. Replacement is necessary when the original cap is damaged or lost. Consult your owner’s manual and appropriate diagrams to locate the correct position for installation on your specific Ryobi table saw model (RTS series). Ensure a snug fit, securing the cap over the brush housing. This prevents debris from entering and compromising brush performance. Proper installation maintains motor efficiency and extends the saw’s lifespan.
Ryobi Parts Lookup Resources
Locating replacement parts for your Ryobi table saw is streamlined through several resources. Begin by identifying the model number – typically starting with “RTS” – found on the saw’s label. Ryobi’s official parts website provides access to detailed diagrams and comprehensive part lists. Utilize this website alongside your owner’s manual for accurate identification. Keywords like “RYOBI,” “Precision,” and “System” can aid online searches. Ensure compatibility by cross-referencing part numbers before ordering, guaranteeing a proper fit and function.
Ryobi Official Parts Website
Ryobi’s official website serves as the primary hub for locating genuine replacement parts for your table saw. This resource offers exploded diagrams, detailed part lists, and accurate model-specific information. Navigating the site requires your table saw’s model number, ensuring you find compatible components. The website facilitates easy searching and ordering, streamlining the repair process. Always verify the part number against your owner’s manual before finalizing your purchase. Accessing this resource guarantees quality and proper functionality for your Ryobi tool.
Using Model Numbers for Parts Identification
Accurate parts identification hinges on your Ryobi table saw’s model number, typically found on a label starting with “RTS”. This number is crucial when searching for replacements on the official Ryobi website or contacting customer support. Without it, finding the correct component becomes significantly more challenging. Referencing the owner’s manual alongside the model number ensures compatibility. Double-check the part number against diagrams to confirm proper fit and function. Utilizing this system minimizes errors and ensures successful repairs.
Understanding Rip Capacity
Rip capacity defines the maximum width of material a table saw can accurately cut. For the Ryobi RTS20, this capacity is a substantial 32-1/2 inches, offering versatility for larger projects. Understanding this specification is vital for project planning. Ensure your workpiece fits within this limit for safe and precise cuts. Other Ryobi models, like the RTS08 and RTS12, may have differing capacities. Always consult your specific model’s manual to confirm its rip capacity before beginning any cutting operation, maximizing efficiency and safety.

RTS20 Rip Capacity (32-1/2 Inch)
The Ryobi RTS20 boasts an impressive 32-1/2 inch rip capacity, making it suitable for breaking down sheet goods and handling wider boards. This generous capacity allows for efficient processing of larger materials, reducing the need for multiple passes. Proper utilization of this feature requires ensuring the fence is securely locked and parallel to the blade. Always double-check measurements and material alignment before initiating a cut. Maximizing the RTS20’s rip capacity enhances project versatility and workflow, delivering professional results.
Ryobi Precision System Compatibility
Ryobi table saws demonstrate compatibility with the BT3000 and BT3100 Precision Systems, enhancing cutting accuracy and repeatability. Additionally, these saws work seamlessly with Craftsman models 22811 and 21829, expanding accessory options. Searching for “RYOBI Precision System” keywords aids in identifying compatible components. This compatibility allows users to leverage a broader range of accessories for specialized cuts and improved project outcomes. Ensure proper installation and alignment for optimal performance, maximizing the benefits of the precision system.
BT3000 and BT3100 Compatibility
Ryobi table saws exhibit strong compatibility with both the BT3000 and BT3100 systems, designed to improve cutting precision. These systems offer enhanced accuracy for repetitive cuts, crucial for detailed woodworking projects. Advertisements frequently highlight this compatibility, though model numbers are sometimes omitted. Users should verify compatibility before purchasing accessories. Proper installation is key to unlocking the full potential of these precision systems. Searching for “Ryobi Precision System” will yield relevant information and ensure a seamless integration with your table saw.
Craftsman 22811 and 21829 Compatibility
Ryobi table saws demonstrate compatibility with specific Craftsman models, notably the 22811 and 21829. This interoperability expands accessory options for Ryobi users, leveraging Craftsman’s offerings. However, verifying compatibility is crucial, as not all Craftsman accessories are universally adaptable. Advertisements sometimes lack clear model specifications, necessitating careful research. Ensure the accessory is explicitly listed as compatible with your Ryobi saw for optimal performance and safety. Proper fit and function are paramount when combining systems from different brands.
Additional Resources
For further assistance with your Ryobi table saw, several resources are available. Ryobi’s customer support provides direct assistance with questions and concerns. Numerous online forums and communities dedicated to woodworking and Ryobi tools offer valuable insights and troubleshooting tips from fellow users. These platforms often contain detailed discussions about common issues and solutions. Exploring these resources can supplement the instruction manual and enhance your overall experience with your Ryobi table saw, ensuring safe and efficient operation.
Ryobi Customer Support
Ryobi offers comprehensive customer support to assist with any questions or issues regarding your table saw. Their dedicated team can provide guidance on operation, maintenance, and parts replacement. Access support through the official Ryobi website, where you’ll find FAQs, troubleshooting guides, and contact information. Direct contact options typically include phone support and online chat, ensuring prompt assistance. Utilizing Ryobi’s customer support guarantees a positive experience and maximizes the longevity of your tool.
Online Forums and Communities
Numerous online forums and communities are dedicated to Ryobi tools, offering a valuable resource for table saw users. These platforms provide a space to share experiences, ask questions, and find solutions to common problems. Users often discuss troubleshooting tips, modification ideas, and parts sourcing. Engaging with these communities can unlock expert advice and foster a collaborative learning environment. Explore forums to benefit from the collective knowledge of fellow Ryobi enthusiasts and enhance your table saw skills;